TIP: To keep things as safe as possible, rely mostly on ESP and only use the more obvious features here and there.
1
Getting Started
Disable Windows Defender
Why is this needed?
Antivirus often flags game cheats as suspicious because they inject code or modify games to enable features like aimbot or ESP. This is normal behavior for all cheat software - not a sign that Noble Cheats is unsafe.
- Open Windows Security
- Go to Virus & threat protection > Manage settings
- Turn off all protection settings:
- Go to App & browser control > Exploit protection settings
- Select “off by default” for each option
- Go to App & browser control > Reputation-based protection settings
- Turn off all options
- Go to Device security > Core isolation
- Turn off Memory integrity
Using DControl
If Windows Defender keeps re-enabling, use DControl:- Download WinRar and install it. (Needed to extract archives)
- Download DControl
- Extract the .rar archive with password “sordum”
- Open DControl then press “Disable Windows Defender”
Required Files
https://www.microsoft.com/en-us/download/details.aspx?id=35https://aka.ms/vs/17/release/vc_redist.x64.exe2
Setting up the Cheat
Overlay Setup
Make sure you have the DISCORD APP installed (normal discord not canary or ptb)Head over to Settings → Appearance → enable Hardware Acceleration → Save → Restart Discord App
After that go to Settings → Game Overlay → Overview → Enable Overlay (enabled) → disable Legacy Overlay if enabled
3
Downloading the Cheat
Cheat Loader Download
You can download the cheat from the link below:https://mega.nz/folder/SFEijIYB#ItpPdnVINK3H-rQXK6DJjw4
Injecting the Cheat
Loading/Injecting
- Run the Loader
- Enter your license key (paste it by right clicking into the loader)
- Press Enter
- After injecting, the loader will close itself, that means you can Start the Game the Menu Key is “Insert/Ins” or “Home”
Common Errors
Loader Connection Issues?
Loader Connection Issues?
- Download: Cloudflare Warp
- Connect to Warp then try to launch the loader!
General fix for most issues.
General fix for most issues.
- FaceIt and Riot Vanguard anti-cheats installed on your PC also interfere with the software. Remove them using “Add or Remove Programs”.
- If you have Windows 11, you must disable kernel isolation and use this fix.
- Also make sure you have “Borderless” or “Windowed” screen mode set in the game settings.
- Disable Intel Rapid Storage Technology in BIOS.
VMX/SVM is not supported
VMX/SVM is not supported
To resolve the issue, perform the following steps:
- Open the Control Panel.
- Go to “Programs and Features”.
- Select “Turn Windows features on or off”.
- Make sure that the “Virtual Machine Platform” and “Hyper-V” options are disabled.If the problem persists, do the following:
- Open the command prompt (cmd.exe) as Administrator.
- Enter the command: “
- Press Enter.
- Restart your computer.
- Open the Control Panel.
- Go to “Programs and Features”.
- Select “Turn Windows features on or off”.
- Make sure that the “Virtual Machine Platform” and “Hyper-V” options are disabled.If the problem persists, do the following:
- Open the command prompt (cmd.exe) as Administrator.
- Enter the command: “
bcdedit /set hypervisorlaunchtype off”. - Press Enter.
- Restart your computer.
To run the cheat, you must also disable Reputation-based Protection (SmartScreen):
To run the cheat, you must also disable Reputation-based Protection (SmartScreen):
- Open the start(windows) menu and search for “Reputation-Based Protection.” Open this window.
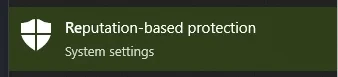
- In the window that opens, disable all options.
AES instruction set is not supported
AES instruction set is not supported
This error means that the processor does not support the AES instruction set, so it cannot be fixed. Contact support.
Please enable Intel VT-X in the BIOS:
Please enable Intel VT-X in the BIOS:
To resolve this issue, enter the BIOS and enable the “Intel virtualization technology” or “Intel VT-X” feature.
Please enable AMD-V in BIOS:
Please enable AMD-V in BIOS:
To resolve this issue, enter the BIOS and enable the “AMD-V” or “SVM mode” feature.
Please disable secure boot in the BIOS:
Please disable secure boot in the BIOS:
To resolve this issue, enter the BIOS, find the Secure Boot option, and disable it.